To those that are new to video compression and encoding, there may be a setting you might not know about, or are unfamiliar with if you have seen it. It’s the “keyframe” setting in many video encoding applications.
A video compression keyframe has nothing to do with an animation keyframe, so let’s get that out of the way first. When encoding video for the web, or anything that needs small files while maintaining decent visual quality, keyframes can be your secret weapon. Think of video compression keyframes as your reference frames to which all successive frames will be based on. This way, those successive frames don’t need to “recreate” the entire frame of visual data, only what has changed from the keyframe.

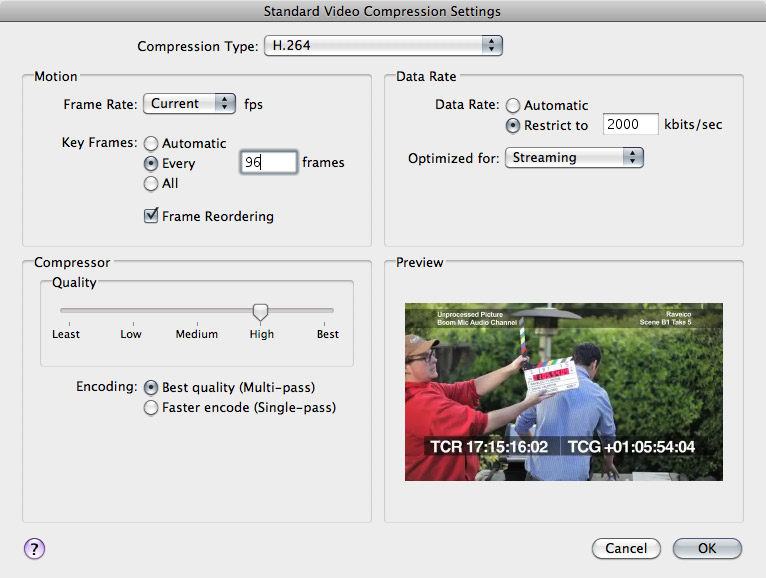
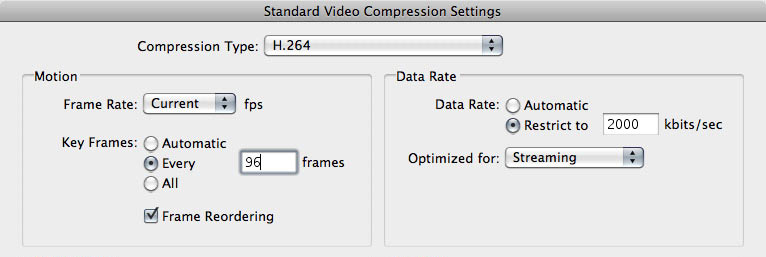
The encoding window in QuickTime Player Pro. Keyframe options are in the Motion section in the top-left area.
So if you had a keyframe for every frame (a value of “1”), you’d essentially have no keyframes and your file size would be huge. If you’re gunning for maximum quality without worry of file size, then definitely set your keyframe to 1.
If you set your keyframe value to 240 (and your video was 24 FPS), then you’d have a keyframe every 10 seconds. This is great for talking head type videos where there isn’t a lot of change in the picture. This will surely help produce smaller file sizes while maintaining quality.
If you’re somewhere in the middle with fast moving elements in the picture, then you’ll probably want to have a value somewhere between 48 and 96 (again, if you’re running at 24 FPS). That will give you a keyframe between 2 seconds and 4 seconds, respectively.
Like any digital art form, you need to play with it to get the best results you’re looking for. Maybe do 10 or 20-second sample tests before you encode your 3-hour feature length masterpiece.
Share this post
Article © OneRiver Media, including applicable photographs. All rights reserved. Article and its contents shall not be copied or reprinted without the expressed written approval of OneRiver Media.
FCC Disclaimer - Links from this article might go to affiliate links to B&H and/or Amazon (not much different than the ads you see in YouTube ads, but more focused). Visiting these links (or buying products from the links) cost you nothing additional and may in turn help us pay for the cost of hosting these free articles we write. These articles take an enormous amount of time (in most cases, weeks and months) to research, draft, write, edit, rewrite, and shoot custom photography/video for. In no way do these affiliate links cover the cost of all of that, so any help these links can provide is a huge help to us to continue to offer free content to our readers.

Comments 2
ORM is really getting a good web prescence – I’m seeing your guys work all over!
That said, I want to get clarification:
“…then you’ll probably want to have a value somewhere between 24 and 48 (again, if you’re running at 24 FPS). That will give you a keyframe between 2 seconds and 4 seconds, respectively.”
Wouldn’t that give you a keyframe between 1 and 2 seconds? May be a typo. If so, feel free to delete this comment. If not – could you explain some more?
Thanks!
RP
Author
Ha! Good catch, Ryan. Actually, I meant to say, “between 48 to 96”, so it’s still for 2 to 4 seconds… again, with the idea of being somewhere in the “middle” per my example. But if you had really fast-cut stuff, coupled with fast shutter speed footage, then yeah, maybe try 24 to 48 frames for keyframes every 1 to 2 seconds. That will surely lead up with large file sizes though. But if the TRT of the video is short, then it may be a moot point. Anyway, thanks again for spotting that, and the change has been made. Cheers!