Tonight at the SF Cutters event at the Adobe building in San Francisco, I presented our recent video, along with frame grabs I pulled from the video to show how well the Blackmagic Cinema Camera performs in extreme conditions when really pushed. I figured, why not show these images to the rest of the world with the explanations I gave at the event? So here we go!
This blog post is a “part 2” from our first post on why we shot this video, why we shot it the way we did, and our post-production decisions based on the footage. You can click on each image to expand a larger version of it. Let’s begin.
For this jib shot, we start low, shooting directly into the Porsche’s headlight. Did you miss that? One more time; we shot DIRECTLY into the Porsche’s headlight! But the fun doesn’t stop there! As we move the jib shot up, the camera reveals our female lead, along with the car’s interior, with full rendering. As we continue the jib shot up to resolve the vertical move, the lightbar on the truck turns on, AGAIN, shooting the camera DIRECTLY into the lights. This is where it gets even more interesting. See the interior of the truck and our male lead in the driver’s seat? When we were framing this shot up with our naked eye, we literally could NOT see the interior of the truck (with the lightbar on) and almost didn’t even have the talent sit in the truck. It wasn’t until we started the camera and viewed the shot on the screen that we soon realized what we were seeing in camera was actually MORE VISIBLE than what we were able to see with the naked eye. If that’s not impressive, I don’t know what is. There’s no way, shape or form that any non-RAW or non-film camera could capture this kind of dynamic range. Note that we did NOT perform any kind of exposure ramping, either in-camera, on the lens, or in post-production. In other words, this sequence is from a single shot from one exposure setting. This is HUGE. Shot with Canon 24mm f/1.4L II.
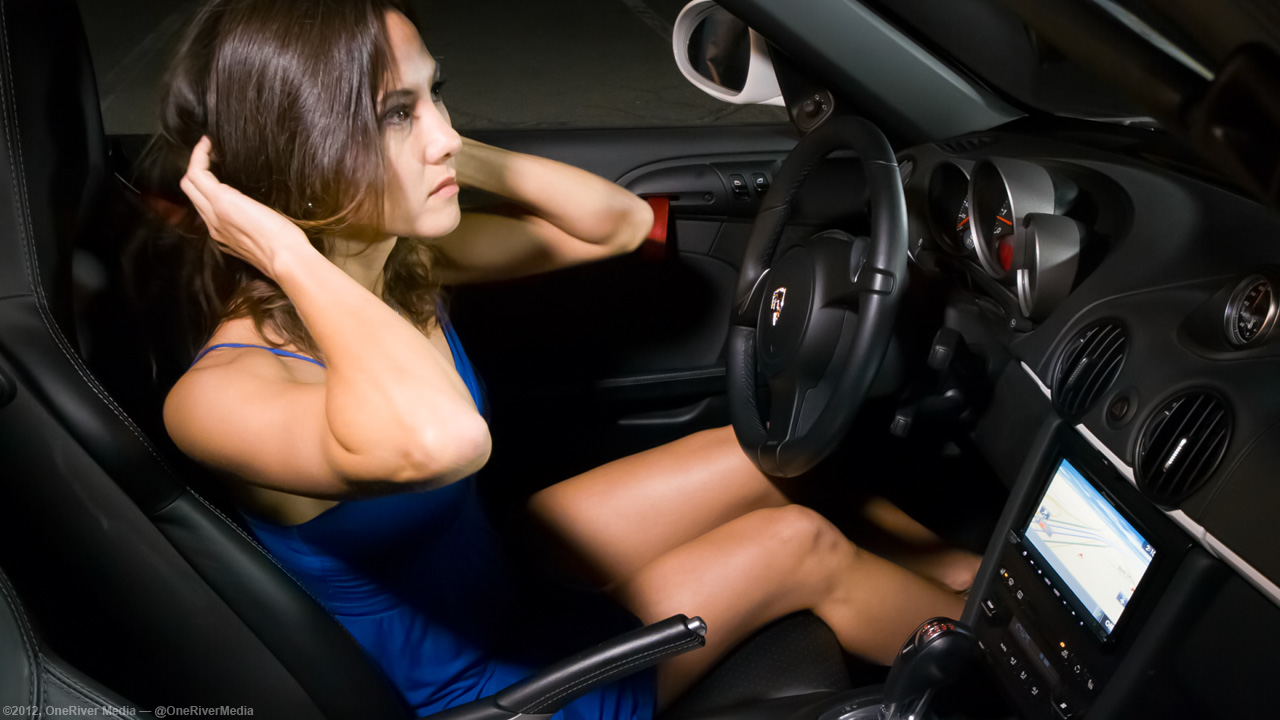
I love this shot. It might be my favorite shot of the video. Sure she looks sexy and all, but that’s not why I love it. First, look at the render detail in the steering wheel, dashboard, and gauge cluster; it’s totally silky smooth. Contrast that low key with her skin tones, again, very smooth and rich. I love the texture and sharpness in her hair as well. Now look at all the fine stitching in the seat and E-brake; crisp and sharp. The superb detail and lack of aliasing and moiré is incredibly refreshing. Even the LCD screen in the center console isn’t blown out; all highlight detail is maintained, while all the shadow detail in the surrounding portion of the image holds up wonderfully. I love my 5D and 7D, but it can’t hold a candlestick to this latitude, sharpness, contrast, and overall fidelity. Shot with Sigma 8-16mm at about 13mm if I recall.
This shot still blows me away every time. I just can’t over how much sheer dynamic range is in this. In the first frame (left), our Polizei officer has nice dynamic range. Note this was a quick Hollywood rigged shot where I had my 1st AC simply hold a small hand-held light through the sunroof, which is what’s casting our main light source onto our male lead. Now in the second frame (right), the strobe light blinks on. This is a real police strobe light, not an LED prop, but a strobe light that emits a huge amount of bursting light. The Cinema Camera is able to manage the intensity of this light, while continuing to render the rest of the image with no problems at all. You can actually see the red light’s clear texture and molding! Any other regular camera would completely blow out and clip. Likewise, everything around the light is maintaining its own integrity without harsh bleed. Shadow and highlight detail maintained throughout. Love this latitude. Shot with Sigma 8-16mm at 8mm, wide open.
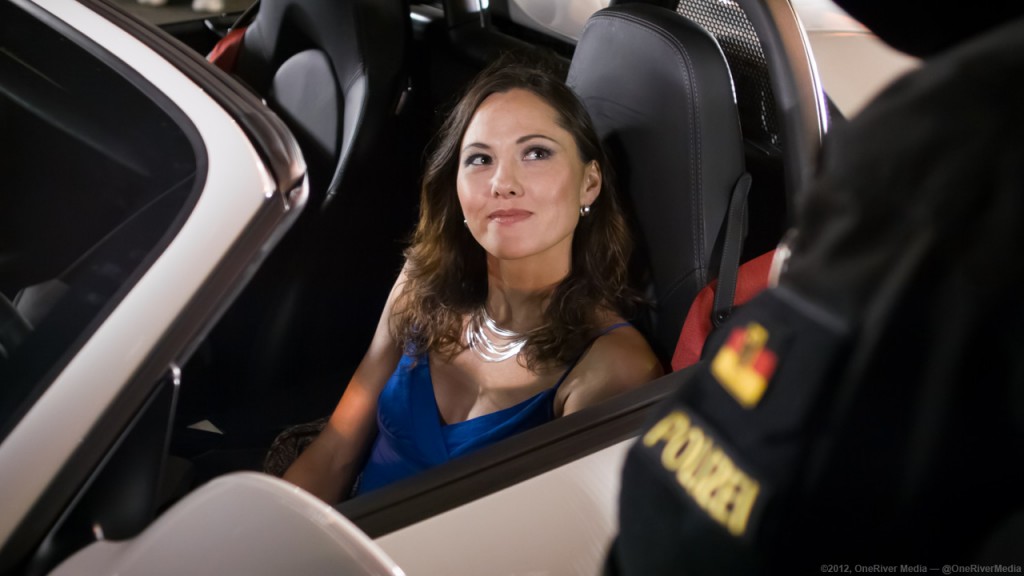
I like this shot because it shows a controlled DOF (depth-of-field), where our female lead is clearly in focus, but the male lead’s Polizei patch is slightly defocused; enough to know what it is, but blurred enough to layer the shot and create separation. I’m still loving the texture and smoothness of the seats and fine detail in the stitching. Shot with Canon 24mm f/1.4L II, wide open.
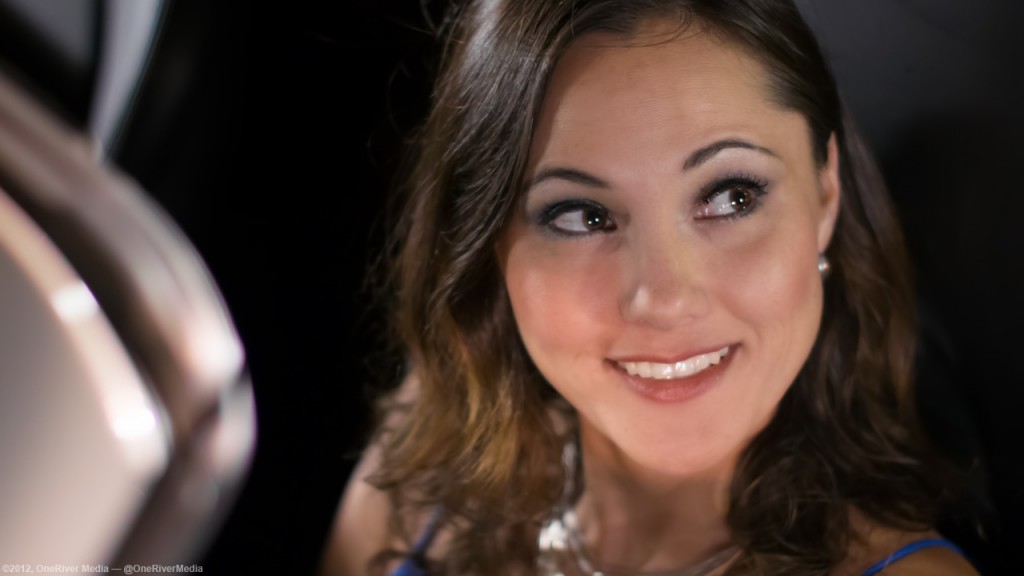
Here we get tighter into our female lead. I wanted to have at least one “5D-esque narrow DOF” shot in the video. Focal plane is on her eyes, where everything else is pretty much defocused. I like that the top of her hair is sharp, and the bottom of it is blurred out, including her neck and necklace. I really like the defocus on the windshield (bottom-left of frame). Shot with Canon 50mm f/1.2L, wide open.
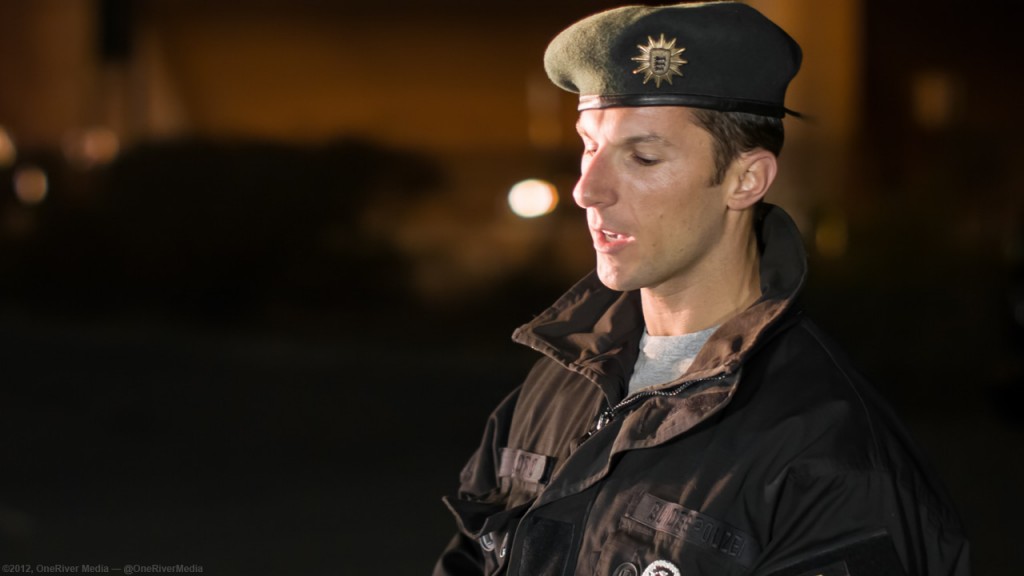
When I first opened this shot up in post, I had an, “oh crap” moment. His right side of his face (frame left), was blown out and basically pure white. Had this been an HDSLR shot, this image data would not be recoverable. But because this was all shot in 12-bit RAW, I was able to pull back the highlights, bringing back the detail in his face. Had I tried that with an HDSLR clip, all it would’ve done was turn his white clipped face to gray. Because we did as Blackmagic Design instructed for RAW shooting and set the zebras to 100% clipping, I knew we’d be safe when we were shooting, as it did not clip on-screen. Another tip of the hat to 13 stops of dynamic range in 12-bit space. Lifesaver! I’m pretty sure we used the Canon 24mm f/1.4L II on this shot, but if not, it was the 50mm f/1.2L.
Another jib shot, and again, shooting INTO the lights. As the female lead crosses the lightbar, I like the rendering of the glow in her hair. I also like the shadow detail in the Polizei officer’s uniform. And once again, the Porsche headlights are clean and distinguishable, and not blown out or overly glowy. Shot with the Sigma 8-16mm at the 14mm end if I recall.
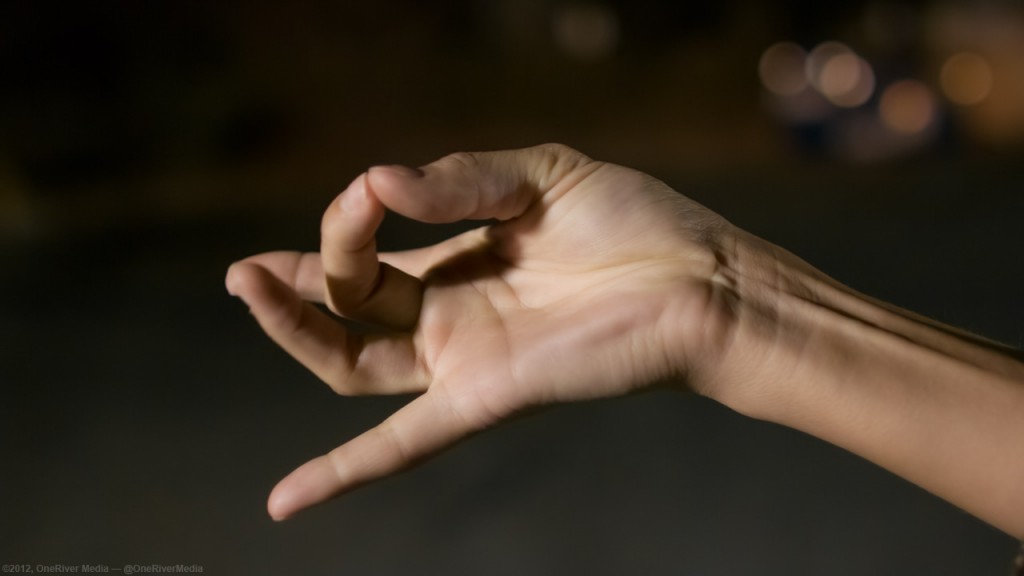
I like this shot for a few reasons. I like the skin tones and the clarity in the area where her thumb meets the wrist; the highlights in the skin crevasses are nicely sharp and clear. My DSLRs can’t capture this kind of detail at this level. And for good measure, some bokeh (circles of confusion) at the top-right of the frame. Shot with either the Canon 24mm f/1.4L II or Canon 35mm f/1.4L.
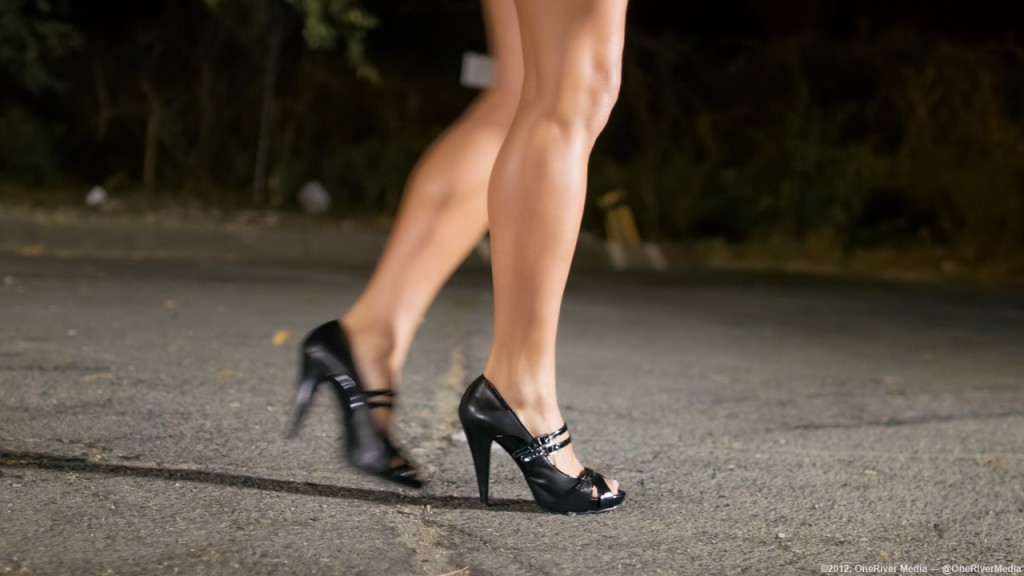
What’s not to like about this image?!! Smooth and rich skin detail. Sharpness and clarity in the shoes. Noticeable DOF plane. All good stuff. One of the things I love about the images from this camera is how nice and sharp they are. I’d rather have that and soften it in post if I felt the need to “film look” it. For me, having a foundation of clarity, sharpness and latitude allows more creative freedom later in post. Alternatively, starting soft and sharpening after the fact is a bit trickier, especially if you need to perform an optical zoom in the edit. Start clean and sharp I always say. Shot with the Canon 24mm f/1.4L II.
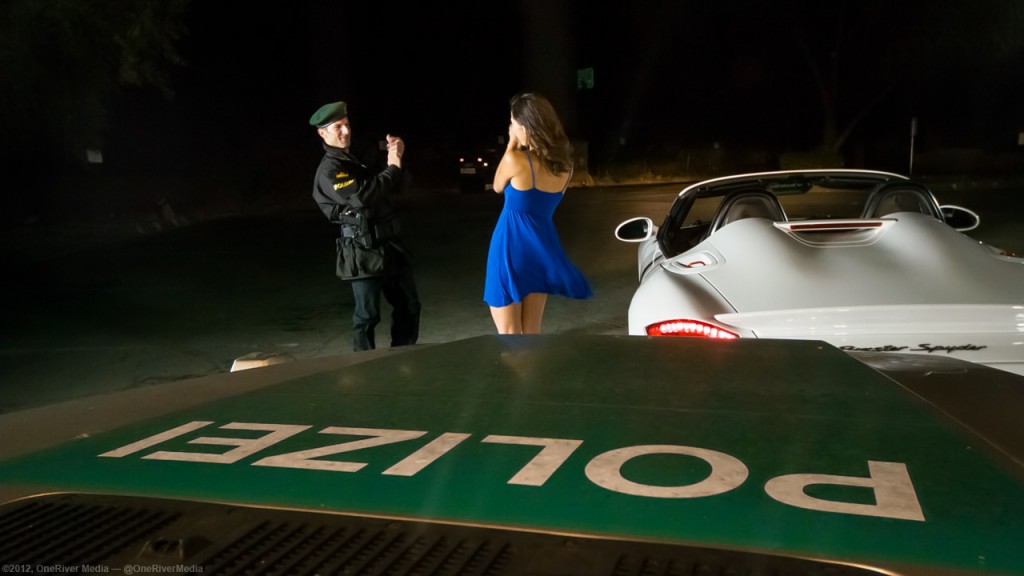
I love how the blue dress just POPS in this shot. There is no chrominance/saturation clipping to be had at all! The Polizei hood is mucky because of dirt, not because of any form of compression artifacts. Shadow detail in his uniform is also very nice. And look at the white zones on the Porsche; silky smooth with absolutely no banding, clipping or macro blocking. Shot with the Sigma 8-16mm at about 12mm.
So with all that said, hopefully this clears up any standing confusion why we shot this video the way we did. Again, I didn’t want to merely shoot lock-down shots of pretty daytime scenery, as that doesn’t always test a camera to its extremes, even though it may show beautifully rendered images. Instead, I wanted to push the camera, see how well it operates in a real production environment with cast and crew, lens swaps, re-rigging, and so much more. My goal was to test dynamic range, sharpness, skin tones, DOF, wide-angle use, et al. In the end, we put our neck on the line and thought out of the box to produce a video that probably wont please some people that were expecting a glossy beauty video. But this video was for us, for our testing, and for our understanding as to how deep we could push this camera. I don’t regret it, and would do it again! As I said in Part 1, what’s living life if you don’t take chances? We took the chance, and we are overjoyed with the results this camera provided for us.
Cheers!
Share this post
Article © OneRiver Media, including applicable photographs. All rights reserved. Article and its contents shall not be copied or reprinted without the expressed written approval of OneRiver Media.
FCC Disclaimer - Links from this article might go to affiliate links to B&H and/or Amazon (not much different than the ads you see in YouTube ads, but more focused). Visiting these links (or buying products from the links) cost you nothing additional and may in turn help us pay for the cost of hosting these free articles we write. These articles take an enormous amount of time (in most cases, weeks and months) to research, draft, write, edit, rewrite, and shoot custom photography/video for. In no way do these affiliate links cover the cost of all of that, so any help these links can provide is a huge help to us to continue to offer free content to our readers.



Comments 21
Thanks again for all your hard work Marco.
You and your team did a wonderful job with this project.
Also thanks for the scene by scene breakdown.
Looking forward to seeing more of your work soon.
Author
Thanks so much for saying so, Eric. Your kind words are appreciated!
Great insider explanation, I love the great dynamic range!
Würde es möglich sein, die Verwendung von den neuen Samyang Cine Lenses in der BMCC zu sehen?
Author
Thank you for the nice comment, Tom. Yes, the dynamic range is really unbelievable! We actually have the 8mm Rokinon Cine lens (same as the Samyang) and showed how it compared in our recent blog post about wide angle lenses with the Cinema Camera here: http://www.onerivermedia.com/blog/?p=677
Thanks again!
Which NLE did you use ?
Author
At first we were going to use our Avid Symphony, but we’ve been having issues with it with errors and such, so we decided to use Premiere CS6, which has actually been working great for us on our day-to-day projects as well. Premiere isn’t perfect (yet), but I’ve been fairly happy with it so far. Thanks.
How did you manage the workflow with Cinema DNG files and audio sync in Premiere? Did you made the sync before in Resolve. Would be great to hear more about your workflow.
Author
Hi Chris. Yes, Resolve is used to automatically marry the audio with the CinemaDNG files, to which proxies are then made. In the case of this video (and any other video where we record dual system sound), we then swap the proxy audio with the DSS audio in Premiere when the edit is done, and then send it to ProTools HD for final mix and sweetening. I have many different workflows I’ve created for the Cinema Camera, which I share in person at events and workshops. We’re also in production for our Cinema Camera instructional series which will also cover those workflows. If you want to know when these events, workshops and videos are available, please sign up for our newsletter at onerivermedia.com/bmcc. We’re in Atlanta in two weeks presenting at the Atlanta Cutters group, then a 2-day workshop covering the Cinema Camera in detail. Thanks!
Great job!! loved the short
On the technical side, as you have mentioned, impressed with the dynamic range.
Thank you for posting such a detailed article
Author
Thanks so much for saying so, Harsha. That’s very kind of you.
Dang, Marco, now I’m going to want to shoot CinemaDNG instead of ProRes 422 HD on my BMCC when it finally arrives! 🙂
Really good info. Thanks very much for sharing! Cheers.
Author
Thanks so much, Peter! Yes, always wanting to shoot in CinemaDNG is very tempting indeed! But I gotta say, ProRes HQ isn’t no slouch either, LOL! But yeah, having all that dynamic available on tap is truly refreshing. Thanks again!
To me it looks unnaturally overlit, like a music video. Is it possible to get this footage to look like film?
Author
Yes, we intentionally over-lit it to stretch the dynamic range capabilities of the camera. And we did do a neutral grade with high contrast to help show that range. But yes because the files are 12-bit RAW, so there’s a ton of flexibility in smoothing or bringing down highlights, lowering contrast in the low/mids/highs and such. We really just wanted to show a wide range of contrast to show the dynamic range and without hiding it with a glossy grade.
Well, I have to say after watching this few times, this is absolutely right way done for a camera test where the camera has emphasis:
I really like how it looks as it is, it looks mindblowingly high fidelity imagery that way. Well lit set results awesome looking results. Imitating the look of film (especially its flaws) isn’t always the ultimate goal, at least I feel it should not be. I have never shot with film and I have never really loved film and I can’t fully understand why people want everything look like film. It is like older aged High End hifists liking vinyls and tube amps for their “sound” that has nothing to do with high fidelity (in other words super accurate reproduction of the original). I have never had vinyl player and I couldn’t care less about tube amps. I want super-accurate reproduction, not some warm tube sound with tube distortion and poor channel separation and lacking low frequency range from a vinyl. It can be nice “sound” or nice “look”, but has nothing to do with the superiority or inferiority of the camera (or sound reproduction respectively).
I have to admit though that like the look in the new Battlestar Galactica series, this grainy gritty look. But I don’t think everything needs to be grainy gritty. It depends on the story being told, and somehow for the BSG the grainy look did fit perfectly with its cinema verite style where most of it is shot shaky handheld and there is a constant rush in the story. Shooting something like this and pushing it with lots of grain and too little lights and not getting everything out of the dynamic range, would not reveal the capabilities of the camera and the pixel peeping would make no sense. In Galactica the grain is so heavy and the lighting is such stylized at times (e.g. eyes not visible unlike in this short), that it diminishes the ability to review the real resolution and the latitude of the camera (looks like there isn’t much when it is pushed that far). Fine for the mood, but would be really bad for a camera test and I couldn’t tell from the end result if I wanted a Blackmagic Cinema Camera or not. According to this test, it seems I want the BMDCC. Canons are such crap compared to this that if the BMDCC would shoot high res stills also in addition to the awesome video, my 5D would be for sale right now (I need both stills and motion camera or two cameras alternatively, one for stills and another for motion, but would be much better if the same camera did both extremely well).
Great clarification Marco! Thanks for dissecting this camera. Even though I was there, I didn’t get to press the buttons and kick the tires. 🙂
Mr. Solorio,
Congratulations for your beatiful job. I enjoyed the article as much as the video. Thank you.
Ps: greetings from Peru.
Thanks for posting this video and explaining your thinking behind the choices you made. White car at night with a a bank of searchlights aimed at it? Obviously! Why not put a guy in an all black uniform next to it while you’re at it …
A number of posters on nofilmschool have suggested you used lots noise reduction after the fact. Did you? If so, what and on which shots?
Also, I’m wondering about the flashing red and blue strobes (0:37-0:50) shining out of the police windshield. Did you do anything to treat those or are they as recorded in camera? They show very little of the rolling shutter issues I’ve encountered with other CMos cameras and strobes so I’m wondering a) if you got lucky with the strobe durations, b) the rolling shutter is better than other cameras (RED and EX series especially – obviously beats 5D too but the hood mount shows that) OR c) you applied some post fix to help out, and if so what?
Thanks for sharing your work and for choosing content that would test the camera’s limits.
Author
Yeah, I think some people don’t realize how hard it is for many cameras to cleanly rasterize exactly that, a white car at night with heavy direct lighting on it, while at the same time, a black object sustaining detail (the uniform). My Cinema Camera and 5D Mk III Comparison video (also on Vimeo) shows this clearly in the Mel’s Drive In section. Fun stuff! The default NR using AdobeRaw Reader (as used in the Texting video) is 25%. Some shots were increased, but not enough to blur it out. The strobes at the top of the windshield were added quickly in post; just some simple flares. The strobe at the bottom of the windshield is an actual strobe that was turned on and recorded by the camera. Sometimes the strobe would cut out, just the nature of CMOS (and a $3k camera no less). Thanks for the nice comments, and cheers!
Bang-up job, Marco! I’d imagine Grant’s thrilled with your advocacy, and the Canon crew, well, maybe they’ll seek you out for some C500 demos };^)>
Both this and the comparison video are excellent assessments of this new tool. Have you done any shoots with Zeiss glass yet?
Best always,
bt
Author
Thanks for the nice words, Bill! =) I haven’t used any Zeiss glass on the Cinema Camera yet. I’d say 85% of it has been Canon L, and have been pleased with the optics (mechanics have always been blah). Would love to use the new Super Speed CP.2 lenses! 😉