In this B&H Exclusive Review, Marco Solorio of OneRiver Media reviews the new Sennheiser AVX-MKE2 Camera-Mountable Lavalier Pro Digital Wireless Set (with MKE2 Lavalier microphone) in real-world production environments, including feature film production. Does this kit and its microphone hold up to all of his expectations?
Sennheiser has been a long-standing name in the audio industry for decades, including the ownership of Neumann (unquestionably some of the very best microphones in the world, to which we own several models).
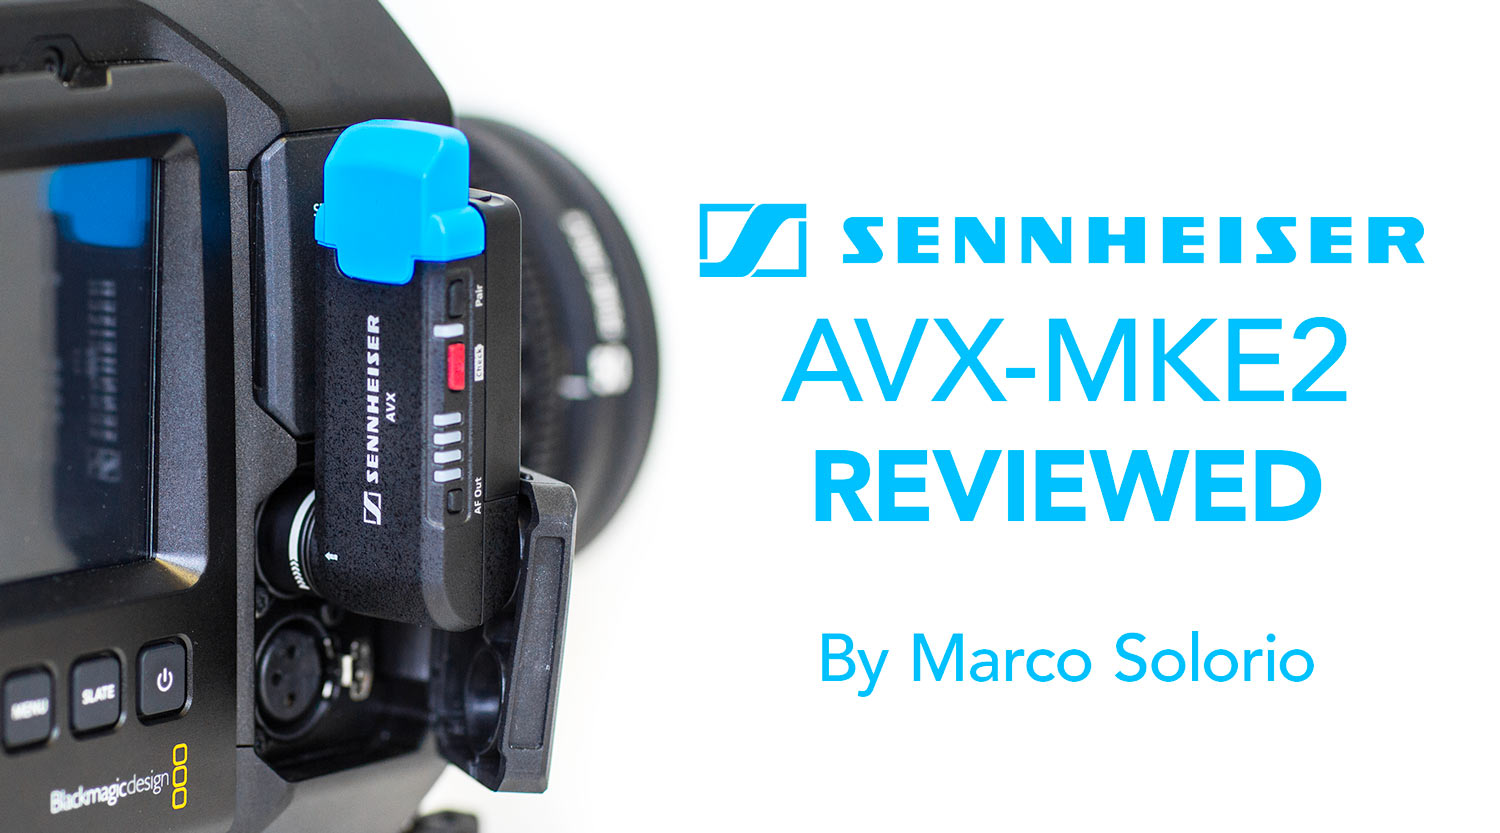
I recently received the new Sennheiser AVX-MKE2 wireless lavaliere (lav) kit from B&H for review to run this system through the paces. What intrigued me at first (and thus helping me to ultimately decide on reviewing this kit) was the compact design of the units themselves, namely the receiver unit. Rather than having the traditional receiver “box”, this receiver basically plugs directly into your camera’s XLR port, rather than having to mount it elsewhere on the camera with a messy cable. I’m a HUGE fan of tidy camera rigs, so the fewer the cables dangling around, the better.
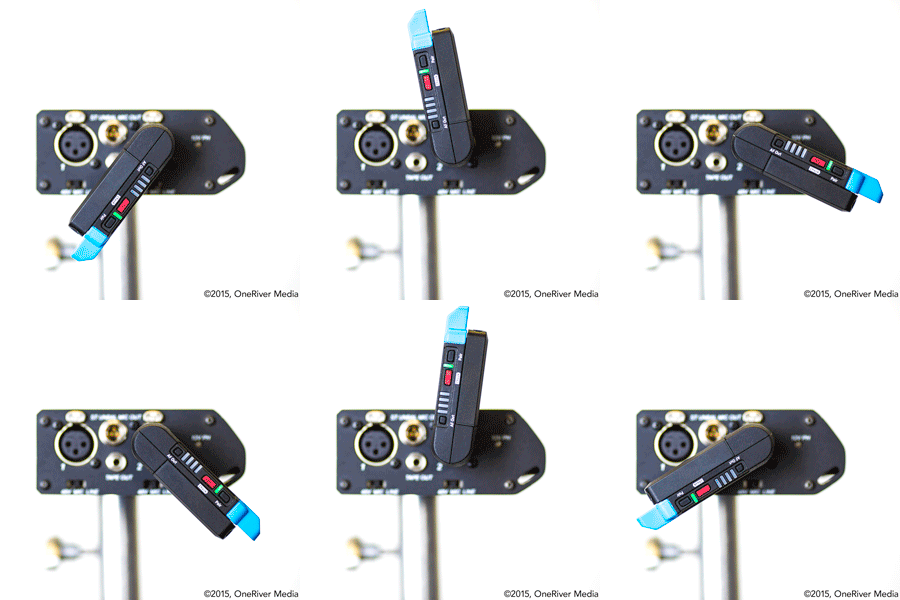
Almost an entire 360° of rotation with the AVX receiver. Attached here to the Sound Devices MixPre-D.
The receiver’s XLR connection has a rotating mechanism in it, so you can easily reposition it to fit the contours of your camera body. I love this. It really makes it feel like the receiver is actually part of the camera body itself, rather than an accessory connected to it. As shown in the photo to the right, the rotation mechanism has soft notches in them, to help keep the rotation in place. Each pause in the animated photo represents each soft notch in the rotation mechanism.
Obviously you can still connect the receiver with an XLR cable in cases where plugging the receiver directly wont work. I’ve owned short 1-foot XLR cables for years, so I can use those in this case if needed. But so far, any XLR port I’ve connected the AVX receiver to has worked without a problem of anything being in its way, whether on-camera or in our audio field bags.
Sennheiser includes a short XLR to 1/8″ TRS cable if you need to plug into 1/8″ connections (like the Pocket Cinema Camera or any DSLR camera’s external audio input). They even include a hot shoe mount so you can mount the extremely lightweight receiver to any DSLR or small-bodied camera without any adverse increase in weight. This is a win-win combo for any DSLR, mirrorless, or compact camera shooter.
 On compact setups, like this Blackmagic Design Pocket Cinema Camera setup (with our LockCircle PrimeCircle XM50 cinema prime lens and Metabones BMPCC Speedboster), the Sennheiser AVX receiver adds virtually no added weight and bulk to the overall rig. This is a huge value-added bonus for those shooting with cameras like this or DSLRs. Increasing the receiver’s audio output gain (by clicking the AVX receiver’s “AF” button with accompanying red LED bars showing output strength) can help with camera’s like this that inherently work best with high output gain devices.
The transmitter is very lightweight as well, but still has the same relative size as most wireless lav transmitters. But comparatively speaking, I’d say this unit leans on the smaller side of most, which is obviously a good thing.
So let’s get to the nitty gritty. How does the audio quality size up with this kit?
First off, I’ve been impressed with both the audio quality itself and the transmission quality from this unit (which uses AES 256-bit encryption by the way at an audio resolution of 24-bit, 48kHz). In a very short time-span of only a few weeks, I’ve used it on real-world production sets across the United States (from the east coast to the west coast), including feature film production. I admit that I was a bit hesitant to do this since I don’t typically like “guineapigging” a brand new untested product in such high critical production circumstances—especially productions under the shadow of paying clients. But the fact Sennheiser is such a respected name in the industry and the fact I own tried-and-true Sennheiser products, I felt confident the unit would work out fine. As a precautionary move, I went to the extent of having a backup wired lav system in place should any single adverse condition surface. In the end, I’ve had zero issues with this unit thus far in all regards.
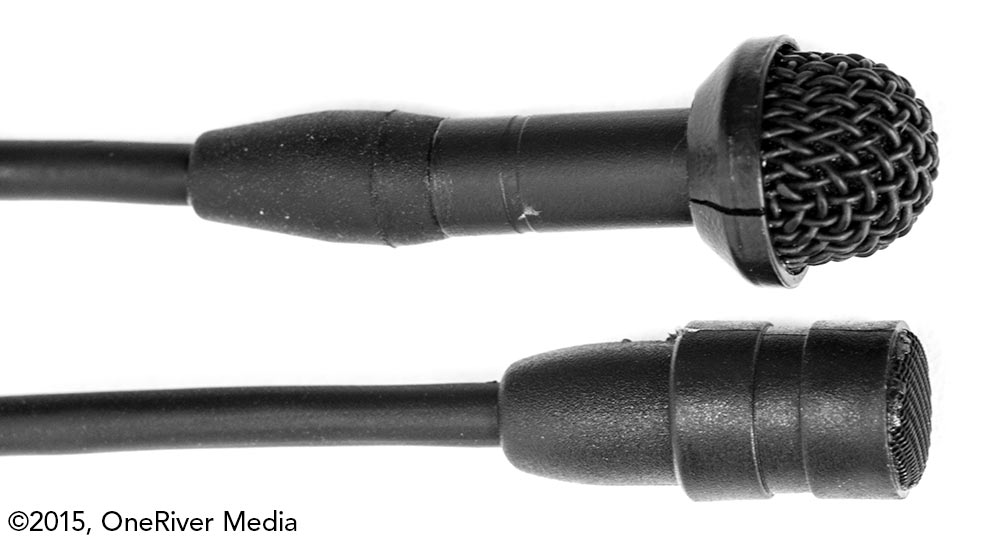
Typically speaking, I’m usually not impressed with microphones that come bundled as a kit with wireless lav systems. This kit is growing to be an exception, but like all things audio related, microphone quality can be a highly subjective endeavor. But for my tastes, the audio quality of the microphone element itself was surprisingly nice. I tend to be a fan of bright microphones (as long as it’s accompanied with a full body sound), as I typically prefer to have the sibilance and airiness inherently in the microphone itself with the option of cutting it later with EQ, rather than it not being in there and boosting it later in EQ. This is just a personal preference and by no means an audio rule of sorts. This kit microphone leans towards bright and I like that.
As compared to my industry standard Sanken COS-11D lav microphone (which works perfectly with the Sennheiser receiver), they both have nice body and brightness to them. I will say the Sennheiser does just a tad more self-noise to it when touching the integrated mic cable between the mic and the transmitter body. In real-world production, I didn’t find this to be an issue however, but felt it was important to note. The Sanken COS-11D is also a bit more sensitive than the Sennhesier MKE2 mic, which translates to lowering the input level of the recording device, which is nice. However, in the audio recording below, you may hear that the Sennhiser mic actually has a lower noise floor, despite the fact it requires higher input gain at the mixer stage. Sensitivity aside, they both otherwise sound surprisingly similar and my hats off to Sennheiser for matching an upgraded microphone package with exceptional quality. In the end, I actually like the sound of the Sennheiser MKE2 mic more so than our Sanken COS-11D mic, which for years has been my go-to lav mic. Looks like the Sennheiser MKE2 will be taking that new position. Dumbfounded!
Listen For Yourself!
Track 1: Sennheiser AVX Sample – Unprocessed
Original recording straight from the recorder. No post-processing was involved at all.
Track 2: Sennheiser AVX Sample – Processed
A combination of Izotope Alloy 2 and Izotope Final Mix were added to these audio tracks within DaVinci Resolve 12 at the track level. All three takes incorporate the same amount of EQ, dynamic compression, slight de-essing, final output compression, and maximization.
Track 3: Sennheiser AVX Sample – Processed & Denoised
Same post-production processing as Track 2 but with the addition of Izotope RX4 for noise floor denoising, all within DaVinci Resolve 12.
Can you guess which takes were on what recording device? Hint, you have the option between the Blackmagic Design URSA 4K (directly, no input mixer) and the Sound Devices MixPre-D digitally into a Tascam DR-680 recorder. Listen to the sample and take a guess. Pretty difficult to tell the difference, right? We thought so too. The answer is below.
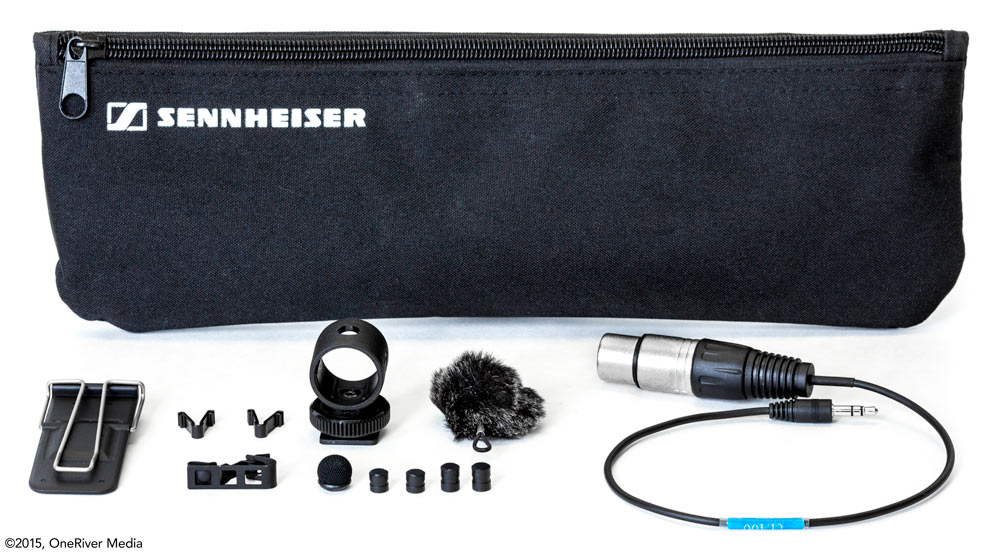
The Sennheiser mic comes with several element protectors, a larger wind screen, and even a miniature “dead kitty” for windy situations. I felt this was a great addition to the kit and applaud Sennheiser for this inclusion.
When the receiver and transmitter are turned on (in either order), they scan each other and quickly pair up and lock. It’s great, as there’s no need to manually pair the two, not even the first time you take it out of the sealed box. Once they’re paired, the two units continually scan for the cleanest frequency range with the least amount of interference, all in real-time. However way it’s technically doing this, it’s doing an excellent job, as I’ve not encountered any RF pops, audio drops, static, or any ugly audio issues, including real world production in major high-tech corporate building environments where RF pollution is heavy (mobile devices, wifi repeaters, radio comms, you name it). It’s in these extreme production circumstances I’m quite religious in using wired lav systems, but the Sennheiser wireless lav kit performed and felt like I was using a wired system but without the tethered limitation of a wired system (which has its own problems when the talent wants to move away from their mark). So to this, the AVX is an incredible performer in audio transmission like I’ve never experienced before. This alone is worth the cost of admission with the AVX wireless kit.
As mentioned already, I haven’t encountered any drop-outs, static, or any other degradation in audio transmission in normal use with the AVX system and that includes real-world production in multi-story corporate buildings with heavy RF pollution. Very impressive to say the least. To go a step further, I tested the AVX system by going beyond “normal use” and took the transmitter to the third floor of an office building (keeping the receiver at the first floor) and even without clear line of sight, the AVX system performed flawlessly, through walls, floors, and RF pollution. Likewise, taking the AVX outdoors in direct line of site was equally impressive. Although rated at 30 meters in Sennheiser’s literature, I could go over 150 meters with absolutely no problem. CRAZY.
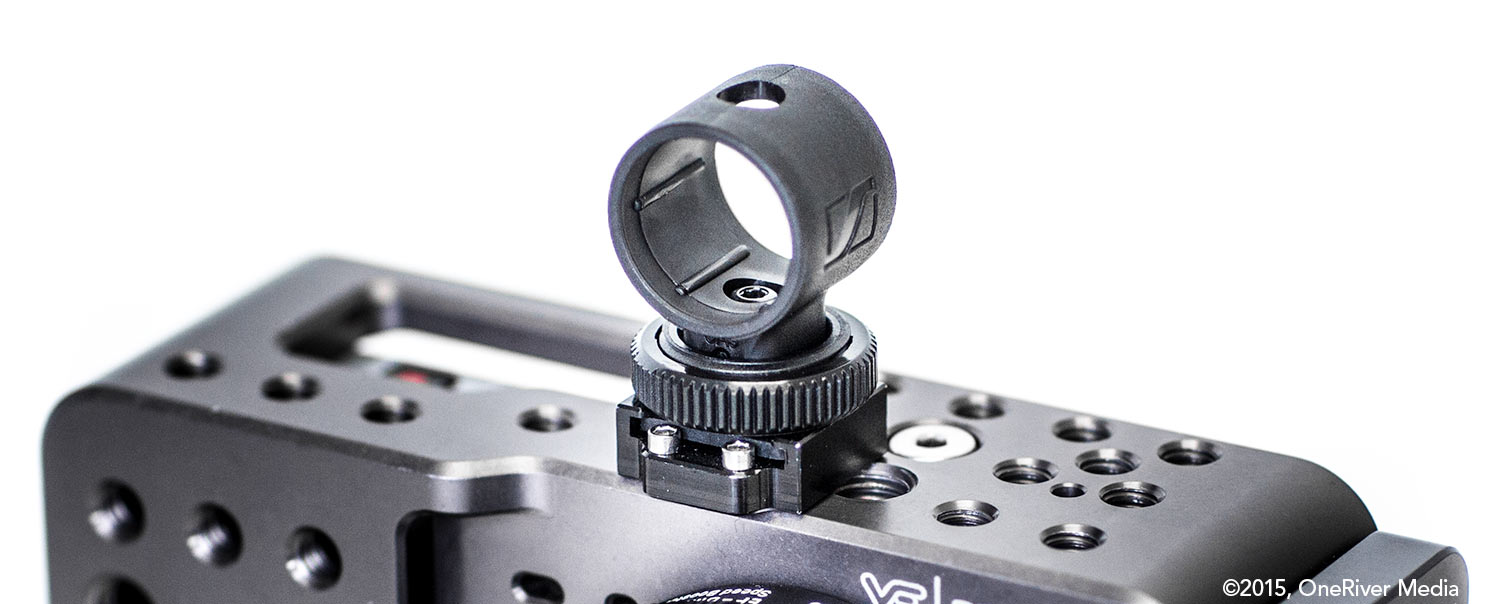
The hot shoe mount supplied with the AVX system allows the receiver unit to slip right in for a snug fit. Hot shoe receiver and cage by Viewfactor.
Both the receiver and the transmitter have a proprietary power packs to power each of these units: the BA30 battery pack for the transmitter and the BA20 battery pack for the receiver. There is a positive and negative to this scenario. The positive is that the packs are quite compact and retain their power for a considerable amount of time: I found the receiver to sustain continuous power for about 5 to 6 hours and the transmitter sustaining continuous power for at least 10 hours. To add, each of these removable power packs have a mini USB port, which can be powered by any 5-volt USB power supply, computer, or device. The negative aspect of this however is because it’s a proprietary format, you cannot simply drop in a fresh set of AA or AAA batteries when you’re in a bind. You can buy additional Sennheiser BA30 rechargeable packs at $50 a pop and BA20 packs at $40 a pop, but obviously that cost can start adding up if you want additional packs as backup, for each transmitter and receiver, and especially if you have more than one wireless lav set. I’d love to see a AA or AAA pack option in the future; even if the battery life is significantly shorter, it could still be a life saver in a pinch. But in normal use on a full day on set, all you’ll really need is one of the supplied BA30 battery packs for the transmitter and one or two BA20 battery packs for the receiver (again, one BA20 battery is supplied with the kit).
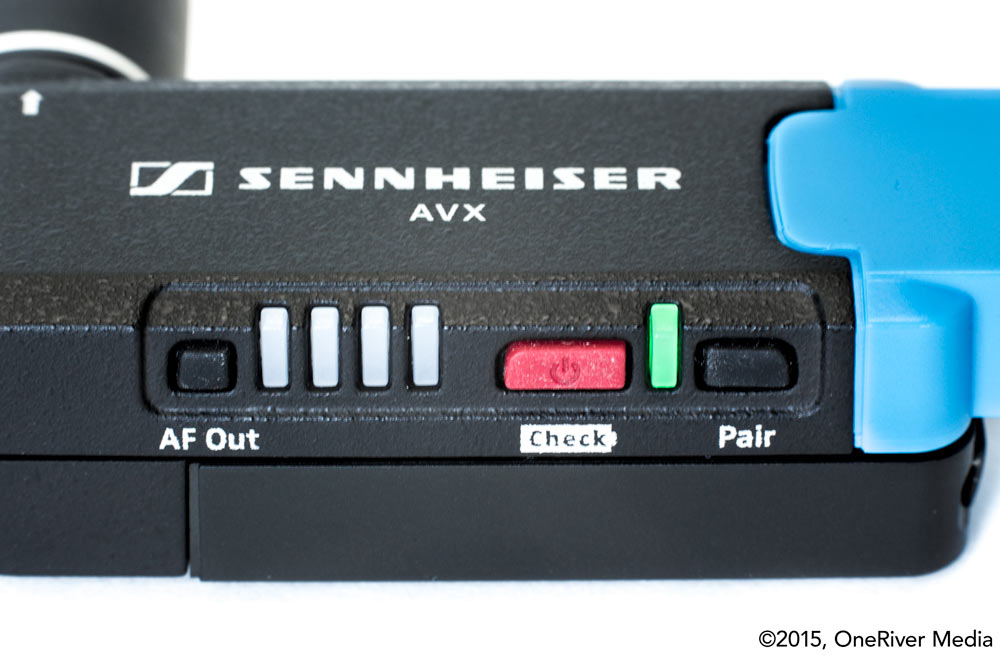
The Sennheiser AVX Receiver is very easy to use. Push the “AF Out” button until the desired loudness output level suits your needs for the devices it’s sending the audio signal to. For small camera devices like Pocket Cinema Camera or DSLRs, a high settings is recommended (will display with four red LED bars). For devices with high quality input stages, use a lower setting (shown with 1 red LED bar). Press the red “Check” button to display battery life, using the same four LEDs, this time in green instead of red. Clever!
Although the receiver can use 48-volt phantom power as a way to automatically turn the receiver unit on and off, it unfortunately does not power and/or recharge the battery pack in the unit. I like the auto on/off feature (saves battery life when the camera is turned off), but it would be great if Sennheiser included the ability for the unit to also be charged by phantom power. As a consolation, you wont have to worry about phantom power accidentally being turned on and frying the receiver unit since this is obviously protected.
On the flip side however, these packs do last a fairly long time on a full day of shooting, even in continuous use. I’ve never had the transmitter die out on me on set using a single BA30 pack. Since the receiver has shorter battery life than the transmitter, I tend to monitor that battery life more closely. Or for worry-free use, I simply plug in a compact Apple iPhone AC USB charger in the AC outlet and plug the receiver into that. With this combo, I don’t have to think about battery life at all, even with both units turned on the entire day.
In the end, both the AVX transmitter and receiver have excellent battery life readouts. By pushing the red button on the transmitter, you instantly see battery life with the red LED bars representing remaining battery life; all red bars on means a full charge and no bars means battery life is depleted. With the receiver, it simply displays the hours remaining on the LCD screen at all times (no buttons to push). When charging, you can push the red power button to show battery charge level, which is represented in bars within a battery icon.
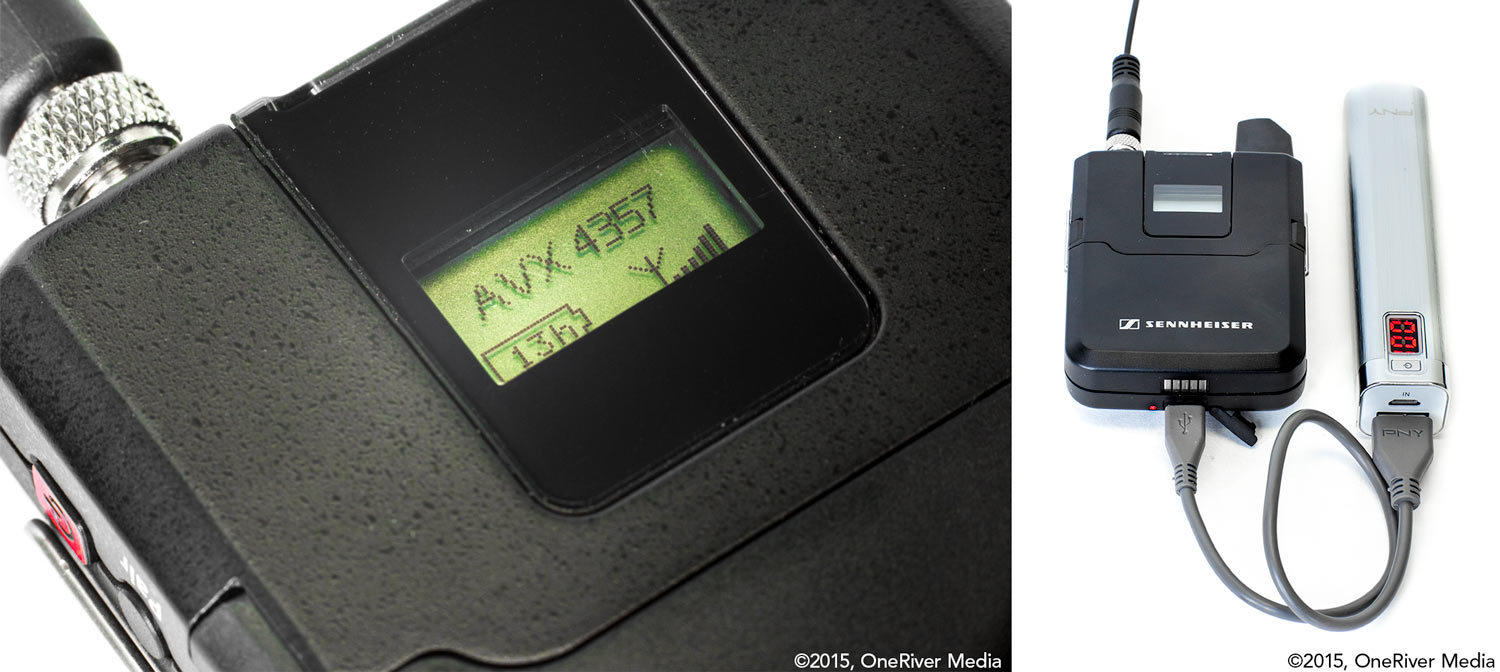
Tip: Because the Sennheiser battery packs use a mini USB port to recharge them, any 5-volt USB adapter (or computer) can charge these packs back up. This also means any compact USB battery pack (typically used to recharge mobile devices) can also be used to re-charge these packs, even while they’re being used. Some of these USB charge packs are small enough to fit in your pocket WITH the Sennheiser transmitter pack, so if you don’t have an extra BA-30 pack handy, you could make due with a USB recharge pack if you’re in a bind (like the slim PNY PowerPack 2600mAh Portable USB Power Charger shown above, or for even longer running power, this Aluratek 4000mAh pack or this Aluratek dual-output 10,400mAh pack).
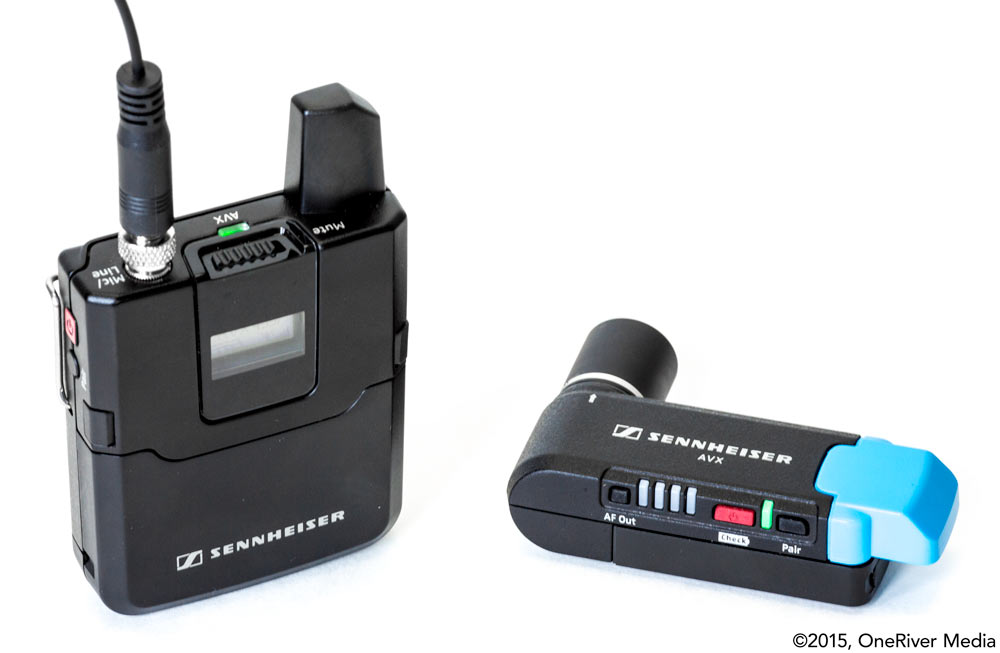
I love that the transmitter unit has the option to switch between mic level and line level. I’ve enjoyed this feature with some of my other wireless lavs (not all manufacturers implement this feature), as it’s nice for times I want to wirelessly send line level feeds, including timecode from the A-camera. For me, this is a big feature to have and glad it’s here.
The unit has an auto-gain control (AGC) feature. This option is usually something many people don’t like (I tend to be one of them). However I’ve found that the AGC in this unit is actually very good. There is no thumping or breathing with the auto-gain algorithm. This can be especially powerful for those that shoot in a run-and-gun situation or for those that do not have a built-in compressor or limiter in their audio chain or recorder. The AGC in this unit acts more like an automatic volume control on general loudness, depending if the subject matter is quiet or loud and less how an actual compressor works using a threshold, ratio, and hard/soft knee. Admittedly, I was a bit turned off and skeptical initially learning of the integrated AGC in this unit (before using it), but in truth, it’s very transparent and so I’ve come to applaud its implementation. And yes, I feel the performance is excellent in any application: run-and-gun, amateur videographers, broadcast, and professional sound recordists alike. A bold statement indeed, but the quality and performance is there.
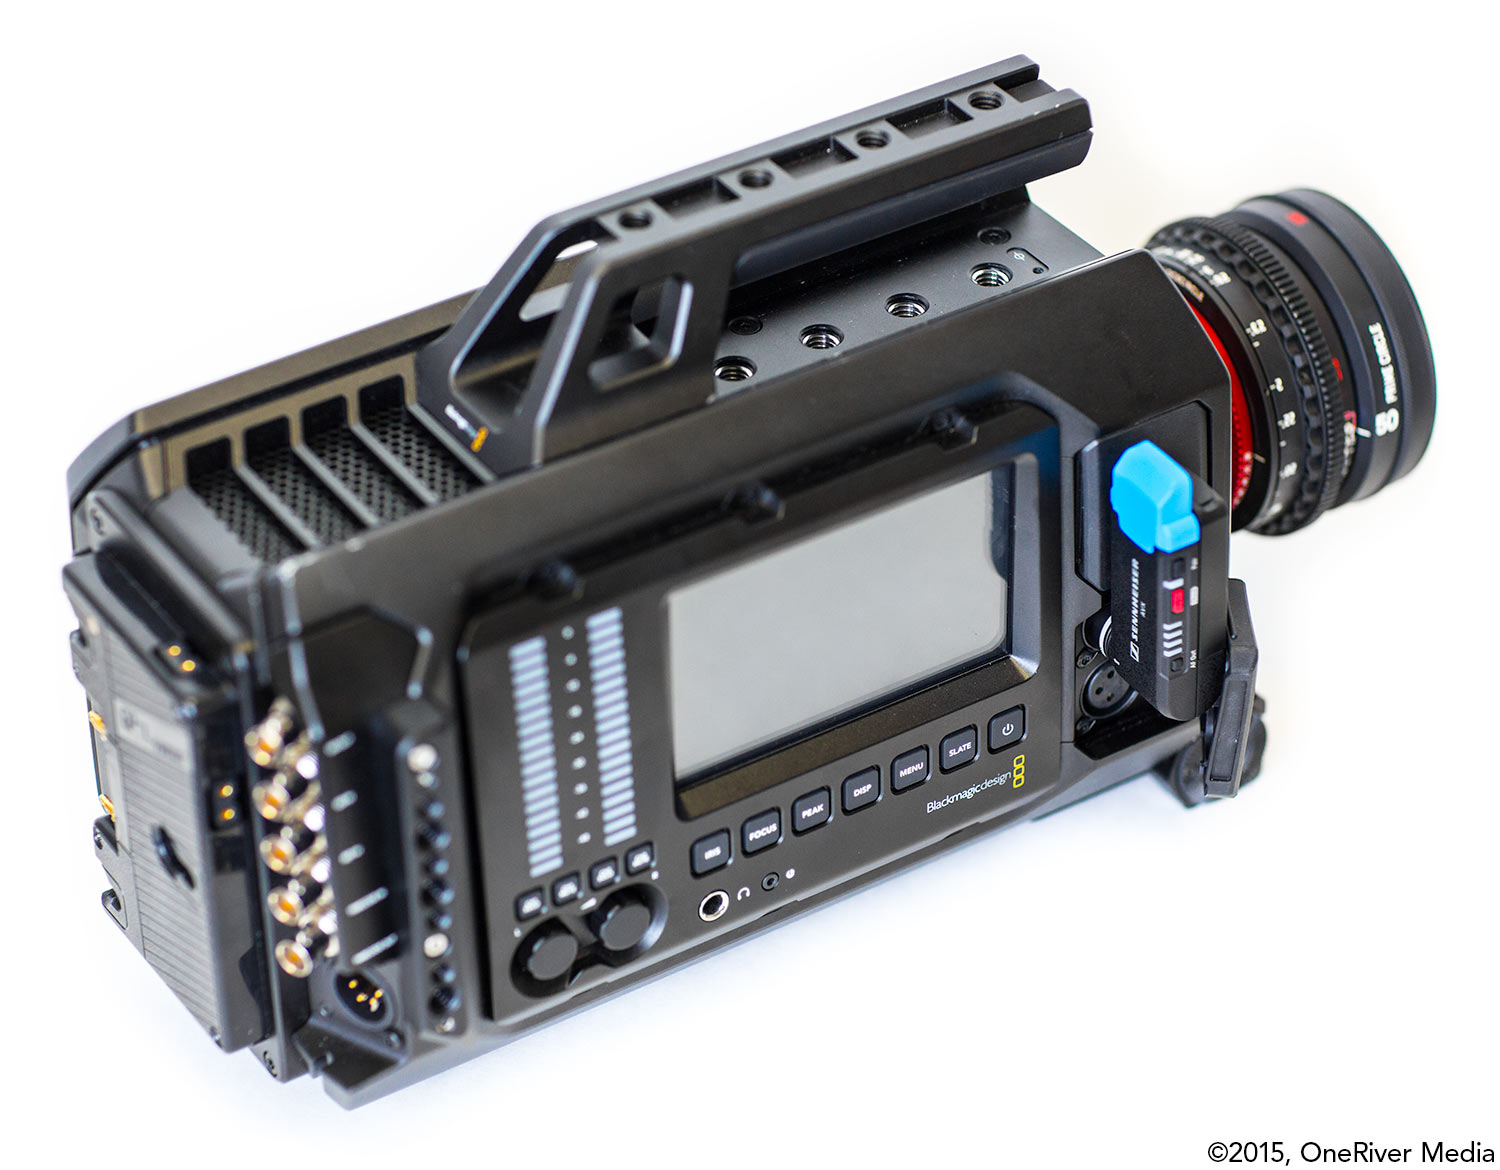
The Sennheiser AVX receiver is virtually hidden on larger format cameras like the Blackmagic URSA. And yes, two AVX receivers and neighboring SDI and 4-pin XLR power cables can all fit, thanks to the AVX’s swivel system.
For what it’s worth, this entire wireless kit is actually made in Germany, from which Sennheiser is founded. Anyone that knows me personally, knows I have a very high preference to all things made in Germany. Much of it is based on their persistent record of world-class engineering and design. I felt this factoid was important to include if this matters to any readers of this review, as it does to me.
Made In Germany
When I was originally approached by B&H to test this $1049.95 unit, I liked the idea of testing a wireless lav system that appeared to fit in-between something low cost in the sub $500 area and something high cost (like the industry standard Lectrosonics wireless systems) in the $2000+ area. After using this Sennheiser system for some time now, I feel it leans more towards the upper-end systems Lectrosonics offers in comparison, but at a much lower cost. And rather than having many of the manual controls the Lectrosonic units offer, it seems the Sennheiser internally performs some of these tasks automatically. Conversely, in no way can low cost alternatives priced at only a few hundred dollars compare to this Sennheiser wireless kit; this unit is far superior to those that I have used and owned in the past.
I’m so impressed by this Sennheiser kit, that rather than sending the unit back to B&H upon completion of this review, I’ve otherwise decided to reach out to B&H to buy this unit and keep it for myself to add to my collection of wireless audio tools… as my main go-to unit. Whether you’re a veteran pro or simply someone that doesn’t want to deal with a bunch of hardware functions to manage and you just want to start shooting with it out of the box, then I would highly recommend this kit. Although the price tag might be a bit high for those with tight budgets, you really do get what you pay for with this kit: the audio quality is truly excellent, the wireless transmission is unparalleled, and the form-factor is superb. It’s because of all three of these highly rated factors, that I ultimately decided to keep this unit for myself.
If you’re on the fence trying to decide whether you want the standard AVX-ME2 wireless kit or the upgraded AVX-MKE2 wireless kit… absolutely go for the AVX-MKE2 kit. The MKE2 microphone is superior in many ways, is much smaller, and actually sounds better (in our opinion) than our tried-and-true Sanken COS-11D mic shown above. As a kit, this mic is only $150 more than the base AVX kit. Bought separately, the MKE2 mic is almost $400 alone. To me, it’s a no-brainer… if you’re saving $900 up for the AVX-ME2 kit, save another $150 for the superior AVX-MKE2 kit. This upgrade is very much worth it.
BUILD QUALITY: ALUMINUM BODY AND EXCELLENT CONNECTORS
PERFORMANCE: 100% STATIC-FREE, LONG DISTANCE USE
Controllability
EASE OF USE: TURN IT ON AND RECORD
QUALITY: 24-BIT, 48KHZ, PRO MIC... ENOUGH SAID
FEATURES: 256-BIT ENCRYPTION, TRANSPARENT AGC AND MORE
DESIGN: SO TINY IT'S PART OF THE XLR PORT
COST: ALL CONSIDERED ABOVE, IT'S A BARGAIN
TOTAL RATING: EXCELLENCE
Sennheiser AVX System Specifications
Special thanks to B&H for sending this Sennheiser AVX-MKE2 system for review. If you’re interested in purchasing this unit for yourself (as I ultimately was while reviewing it), please consider B&H when making your buying decision. Thank you.
Share this post
Article © OneRiver Media, including applicable photographs. All rights reserved. Article and its contents shall not be copied or reprinted without the expressed written approval of OneRiver Media.
FCC Disclaimer - Links from this article might go to affiliate links to B&H and/or Amazon (not much different than the ads you see in YouTube ads, but more focused). Visiting these links (or buying products from the links) cost you nothing additional and may in turn help us pay for the cost of hosting these free articles we write. These articles take an enormous amount of time (in most cases, weeks and months) to research, draft, write, edit, rewrite, and shoot custom photography/video for. In no way do these affiliate links cover the cost of all of that, so any help these links can provide is a huge help to us to continue to offer free content to our readers.
Comments 8
How would these compare to the lectrosonics when it comes to sound quality and durability?
Author
I was literally shocked when I first listened to the AVX systems. The only “advantage” of the Lectrosincs that stand out to me is that they have a lot more manual control of things within the units themselves. However, this is a moot point to me because the AVX system does just about everything automatically. Definitely seems scary, but it truly works magnificently. Auto-link is spot on (and fast), no audible hits in frequency changes and such, super long range, and the gain control on the transmitter is so transparent that you wonder if it’s even on (but it is on). I’m so impressed with these that I would buy another AVX set (MKE2) over a Lectrosincs in a heartbeat. Oh and durability is superb. Both Tx and Rx are made of aluminum bodies with solid unibody antennas. All in all, truly professional systems.
How would you compare this system to the RØDELink Filmmaker Kit?
I think the advantages of the transmitter/receiver and form factor are pretty clear. I’m most curious about the sound quality (assuming that the wireless link is set up and working correctly)?
Thanks.
Author
Hi Reynold. I wish I could give you a better answer in comparison, but I haven’t played with the Rode unit long enough to truly give a credible comparison between the two. With that said, the Sennheiser has a much better build (in both design, ergonomics, and materials). Likewise, the Sennheiser boasts some impressive specs that the Rode unit does not have. Finally, the MKE2 microphone combo is truly hard to beat, as the quality is truly superb. Linking/pairing the Sennheiser is transparent: you don’t need to do anything but turn the units on and thereafter, the AVX units continually communicate between themselves always ensuring a rock-solid connection. The sound quality (with the MKE2 kit mic) is just as good as our wired Sanken COS-11 setup… can’t say the Rode can achieve that kind of high mark. Even between the little I’ve played with the Rode, I definitely prefer the Sennheiser AVX in a pro environment, despite the AVX costing more than the Rode unit. My 2 cents at least! Cheers.
Awesome! Thank you for the detailed and very useful information.
Author
You bet! Glad to help.
Excelent review! When you mention..
as it’s nice for times I want to wirelessly send line level feeds, including timecode from the A-camera.
How exactly does this timecode work? Camara sends line level with timecode to recorder? Or does it work the other way? Sending timecode to camara? If this is true is a hugh + for the avx!
Thanks!
Author
Apologies for the delayed reply. LTC timecode is basically a basic audio signal and depending on what camera you have, it may have TC in, TC out, both, or none at all. If it has TC out, you can simply connect the AVX transmitter to the TC output, select line level and send that wirelessly to your other TC reader unit (like a timecode slate), using the AVX receiver.